
 By
By Chapter 5:
Display news articles
The Read process will look like this:
- For each article, there is a detailed view including ’title’, ‘content’, ‘category’ and ‘image’.
- The Homepage contains a list of articles, displaying a summary of each.
- When the Homepage is loaded, the list of articles is retrieved from the database. It’s also loaded when the articles are added and updated.
We’ll walk through these steps below.
Step 1: Create detail view for article
First, let’s create the UI that displays a single article. Create a new Form, select the BlankPanel template, and rename it ‘ArticleView’.
We want to display an instance of ‘ArticleView’ on our Homepage for each article in our Data Table. We’ll need space for the article’s title, content, category, and image.
Drop a ColumnPanel  component into the page, then change it’s role to
 elevated-card to give it a styled look.
Add these components to the ColumnPanel:
- Title: Label, rename this
title_label - Category: Label, rename this
category_label - Content: Label, rename this
content_label - Image: Image
Your ArticleView UI should look something like this:

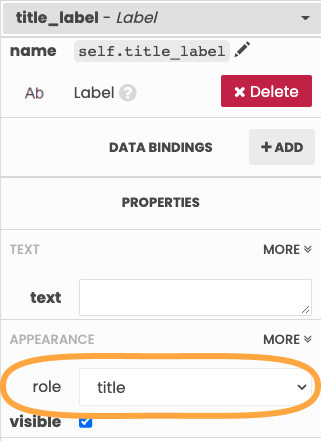
Next, change your title_label’s role to title using the ‘Appearance’ section of the Properties Panel.
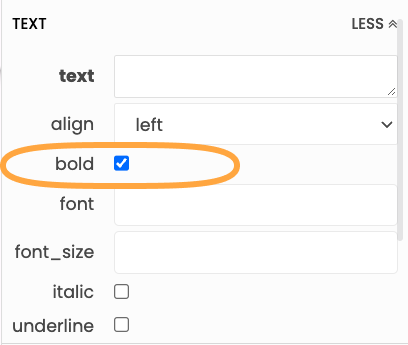
Finally, change the category_label text to be bold. Click on MORE to the right of the Text section of the Properties Panel to change the bold property.
Step 2: Add article view to Repeating Panel
In order to display an instance of the ‘ArticleView’ Form for each article in your Data Table, your ‘ArticleView’ Form needs to be placed inside a RepeatingPanel.
Go to your ‘Homepage’ Form, and drop a RepeatingPanel ![]() onto the page under the ‘Add an Article’ button. Change its
onto the page under the ‘Add an Article’ button. Change its name to articles_panel and set its item_template to your ArticleView Form. The Homepage Form should look something like this:
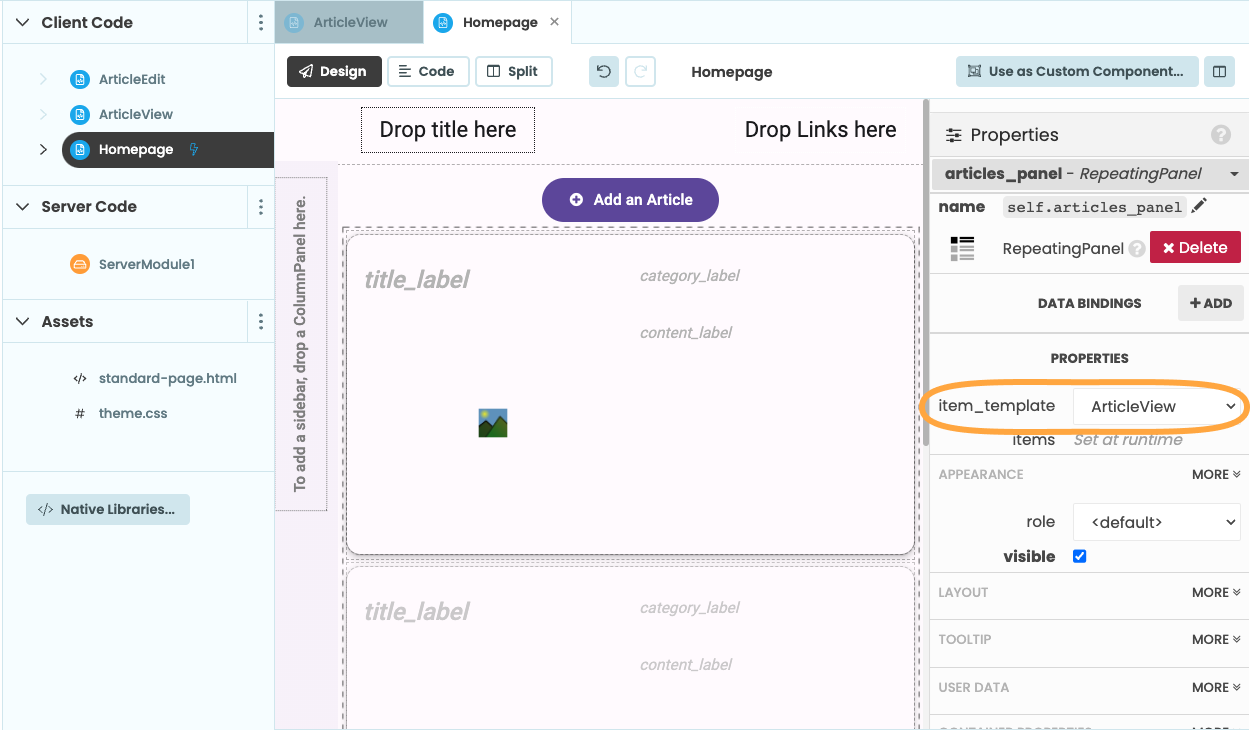
The ItemTemplate property is highlighted in the Properties Panel
Step 3: Display data on article view
Next, we want to display data on each of the ‘ArticleView’ instances. Once again, we’ll use Data Bindings, and the Form’s self.item property to do this.
Open the ‘ArticleView’ Form. For each of the ’title’, ‘category’, ‘content’ and ‘image’ components, add a Data Binding to self.item:
title_label: Bind thetextproperty toself.item['title']category_label: Bind thetextproperty toself.item['category']['name'](self.item['category']is a row from the categories table, so we want to get the ’name’ from the row)content_label: Bind thetextproperty toself.item['content']image_1: Bind thesourceproperty toself.item['image']
Step 4: Fetch the articles from the database
Next, we need to retrieve a list of articles from the Articles Data Table. We’ll use a Server Module to do this.
In the App Browser, select the Sever Module and add the following function:
# In your Server Module
@anvil.server.callable
def get_articles():
  # Get a list of articles from the Data Table, sorted by 'created' column, in descending order
  return app_tables.articles.search(
    tables.order_by("created", ascending=False)
  )
We want to add this list to our Repeating Panel in order to display the articles on the Homepage.
We’ll define a function called refresh_articles() to do this. We can use this function after we update or delete an article and to refresh the content on the Homepage (You can read more about suggested Anvil naming conventions here.
Go back to your Homepage Form, and add this function:
  def refresh_articles(self):
    # Load existing articles from the Data Table,
    # and display them in the RepeatingPanel
    self.articles_panel.items = anvil.server.call('get_articles')
We want to load our news articles from the Data Table when the Homepage is opened, so let’s call our refresh_articles function when the Homepage loads.
Add this line to the bottom of the __init__ method of your Homepage Form:
  # Any code you write here will run before the form opens.
  self.refresh_articles()
We also want to call refresh_articles() after we Create a new article so that the new article shows up on our Homepage. Modify your add_article_button_click to call refresh_articles if we save a new article
  @handle("add_article_button", "click")
  def add_article_button_click(self, **event_args):
    # Initialise an empty dictionary to store the user inputs
    new_article = {}
    # Open an alert displaying the 'ArticleEdit' Form
    save_clicked = alert(
      content=ArticleEdit(item=new_article),
      title="Add Article",
      large=True,
      buttons=[("Save", True), ("Cancel", False)]
    )
    # If the alert returned 'True', the save button was clicked.
    if save_clicked:
      anvil.server.call('add_article', new_article)
      self.refresh_articles()
Run your app. You should now see any articles you’ve added listed on the homepage!
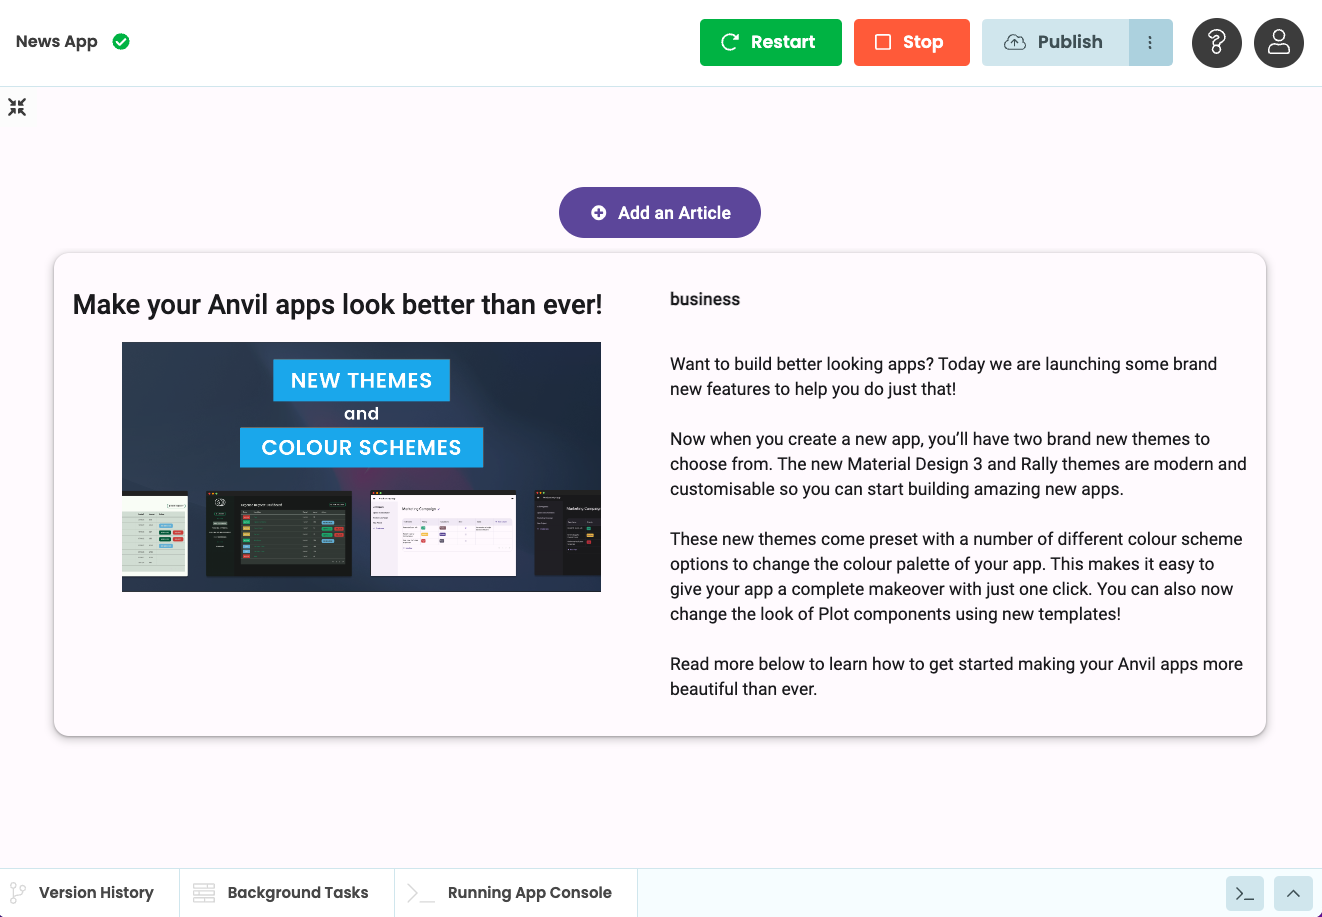
Step 5: How it works
The articles_panel is a RepeatingPanel with the template set to the ‘ArticleView’ Form.
When you set the RepeatingPanel’s items property to an iterable, the RepeatingPanel creates one instance of its item_template for each item in the iterable. It also sets the self.item property of that instance to that item from the iterable.
In this case, get_articles() returns an iterator over the ‘articles’ table, so the RepeatingPanel will create an instance of ‘ArticleView’ for each row in the data table. Each instance will have its self.item property set to its row in the ‘articles’ table. The Data Bindings on our ‘ArticleView’ form read data from self.item, so they will display data from that article.
Our app now displays the articles that have been added, we’ve finished the R in our CRUD app.
In Chapter 6, we’ll allow the user to edit articles. That’s the ‘U‘pdate part of our CRUD app.