Data Bindings
Data Bindings are a way of keeping a component’s properties in sync with the underlying data with minimal effort. A Data Binding associates a property of a component with a single Python expression.
Data Bindings are set per property in the Properties Panel:
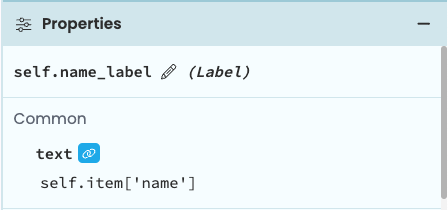
A Label with a Data Binding on the text property
All bound properties for a particular Form are updated whenever:
self.refresh_data_bindings()is called, orself.init_components(**properties)is called, or- the
self.itemfor the Form is set.
If you use “Write back”, the values are written back:
- when relevant input events such as
pressed_enterorlost_focusare fired by the component
See Two-way Data Bindings below for more details on “Write back”.
Creating a Data Binding
To create a Data Binding, find the property you want to bind in the Properties Panel, and click the icon next to the property name. You’ll then be able to write a Python expression. In the image below, the text property of a Label is bound to self.item['name'].
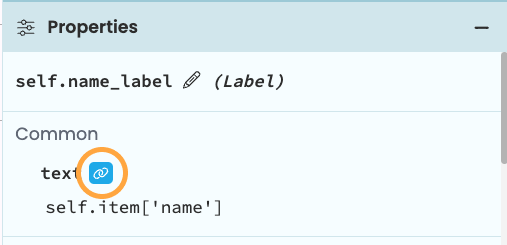
Creating a Data Binding in the Properties Panel
If you want to see all the Data Bindings that you’ve created for a form, select the form and scroll to the bottom of the properties panel.
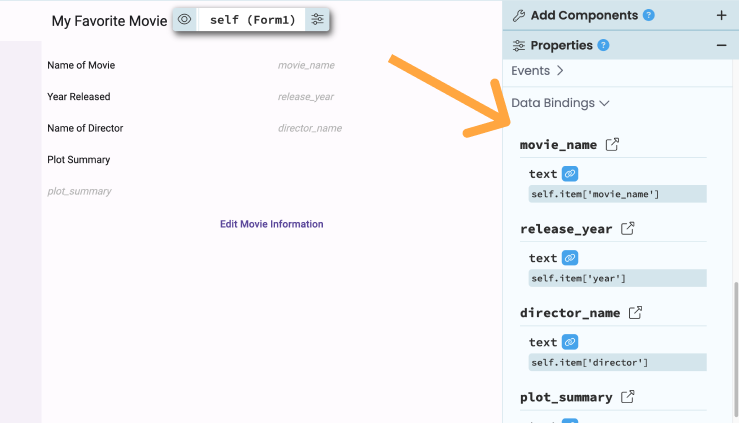
Creating a Data Binding in the Properties Panel
With this Data Binding set up, every time self.refresh_data_bindings() is called, the text property would get set to self.item['name'].
Data Bindings can only access attributes and methods of self - they cannot access variables in the global scope.
If you want to modify variables in the global scope, you can create methods on self that return the global variable
you want to use (such methods are often called ‘accessor methods’ or ‘getters’).
If a Data Binding expression raises a KeyError, it is ignored. This allows you to bind empty or partially-filled dictionaries to a form.
The item property
As well as properties that relate to UI such as spacing_above, components have a special property meant
specifically for storing data of any kind - item. This can be set to anything - a Data Tables row, a custom dictionary, any Python object
(Remember, in Python “everything is an object”).
The item property is useful for Data Bindings because it’s a way for components to hold data and pass it around. Generally, you’ll want to set the item property to a Data Table row or a custom dictionary, and bind a component property to a key in the row or dictionary. The Data Bindings editor will autocomplete with keys from self.item.
Whenever the self.item of a Form changes, all Data Bindings for that Form are updated.
Two-way Data Bindings
For input components such as TextBox or DatePicker, Data Bindings can be two-way.
In order to make a data binding property two-way, toggle the button:
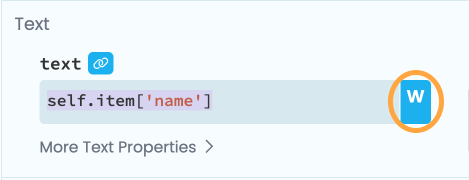
This means that when a user changes the property, the Python object it’s bound to will be updated as part of the processing of relevant events.
For example, binding the text property of a TextBox to self.item['name'] means that self.item['name']
will be set to whatever the user has entered in the TextBox, right before the pressed_enter or lost_focus
events are processed.
Write Back does not trigger when self.refresh_data_bindings() is called, when self.init_components(**properties) is called
or when the self.item for the Form is set. It only triggers when events such as pressed_enter fire on the
relevant component.
Why are Data Bindings useful?
To see why Data Bindings save effort, consider an app where the user enters a number N into a TextBox,
presses a button, and a times table is displayed for that number (N is 4 in the image):
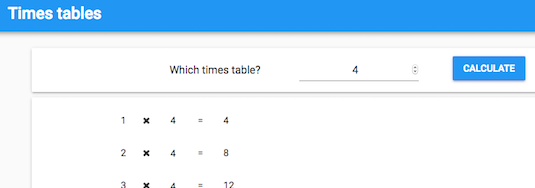
Using Data Bindings, updating the table is one line of code.
If you want your times tables to go up to 12 x N, you can create 12 Labels and bind each of their text properties
to 1 * self.item['N'] (for the first one) through 12 * self.item['N'] (for the last one).
To set N, you can bind the text of the TextBox to self.item['N'] with ‘Write back’ enabled.
Then to update the Labels, just run self.refresh_data_bindings() when the Button is clicked.
  def button_1_click(self, **event_args):
  """This method is called when the button is clicked"""
  	self.refresh_data_bindings()
This means your click handler is just one line.
Without Data Bindings, this method would need 12 very similar lines like self.text_box_3.text = 3 * self.item['N'].
Crucially, the definition of what the Labels mean is kept with the Label, rather than being defined in the Button’s click handler.
On top of that, if you want to have multiple ways of updating the Labels, you don’t have to reproduce the definitions
of what the Labels mean. Let’s say you wanted to make the times tables change when somebody sends an SMS to the app.
Instead of copying all those self.text_box_3.text = 3 * self.item['N'] lines into the SMS handler, you can
just make it do self.refresh_data_bindings() and everything will be updated appropriately.
Equivalent functionality from code
Data Bindings are a function of Forms in the visual designer. If you want to accomplish the same functionality in code, you can use event handlers.
The form’s refreshing_data_bindings event handler will be called whenever Data Bindings are refreshed. You can access a Form’s refreshing_data_bindings event handler by selecting your Form in the designer, and heading to the ‘container properties’ section of the Properties Panel:
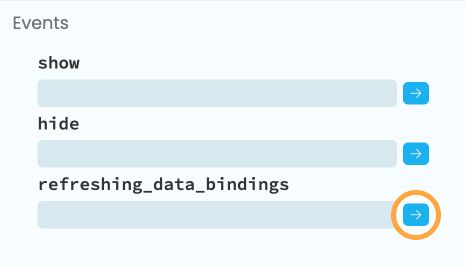
Accessing the refreshing_data_bindings event handler
from the properties panel.
Clicking the blue arrows next to the box will create the form_refreshing_data_bindings event handler, and take you to the function in Code View. Any code you write here will run at the same time as any Data Bindings specified in the designer. For example, the following is equivalent to a Data Binding to a text box:
  def form_refreshing_data_bindings(self, **event_args):
    """This method is called when refreshing_data_bindings is called"""

    self.text_box_1.text = self.item['my_text']
If you want to write back data when the text box changes, you can do this with its change event handler:
  def text_box_1_change(self, **event_args):
    """This method is called when the text in this text box is edited"""

self.item['my_text'] = self.text_box_1.texttry/except block.Do you still have questions?
Our Community Forum is full of helpful information and Anvil experts.

