Version Control and Collaboration
Want to get started quickly on collaborating with other developers? Check out our Quickstart guide:
What is Version Control?
As we write software, it’s good to keep track of the changes we’ve made, and previous versions. This is the job of Anvil’s version control system. It lets you:
-
Track changes that you’ve made to your code
-
Revert to a previous version when you’ve made a mistake
-
Collaborate with others, by working separately and merging your changes
-
Publish one version of your app while you’re editing another
How does it work?
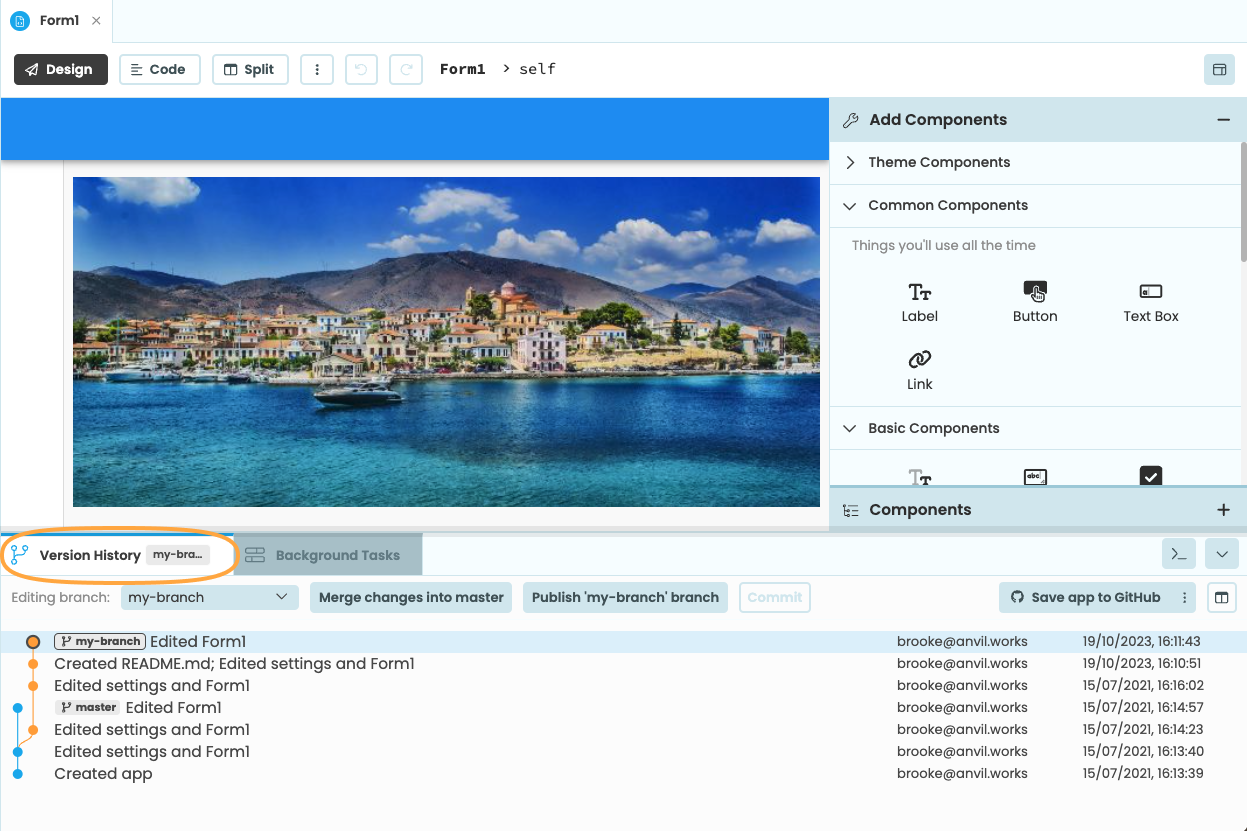
Anvil’s version control is based on Git, the industry standard version control system, but the best way to understand it is to see it in action. Click the Version History tab at the bottom of the Editor to see the history of your app:
Commits
Each blob in the Version History is a commit: a snapshot of your entire app at a point in time. Commits are linked to their parents – the previous version of the app you started from when you made this change. Anvil displays commits in reverse chronological order, so child commits (newer versions) appear above their parents (older versions).
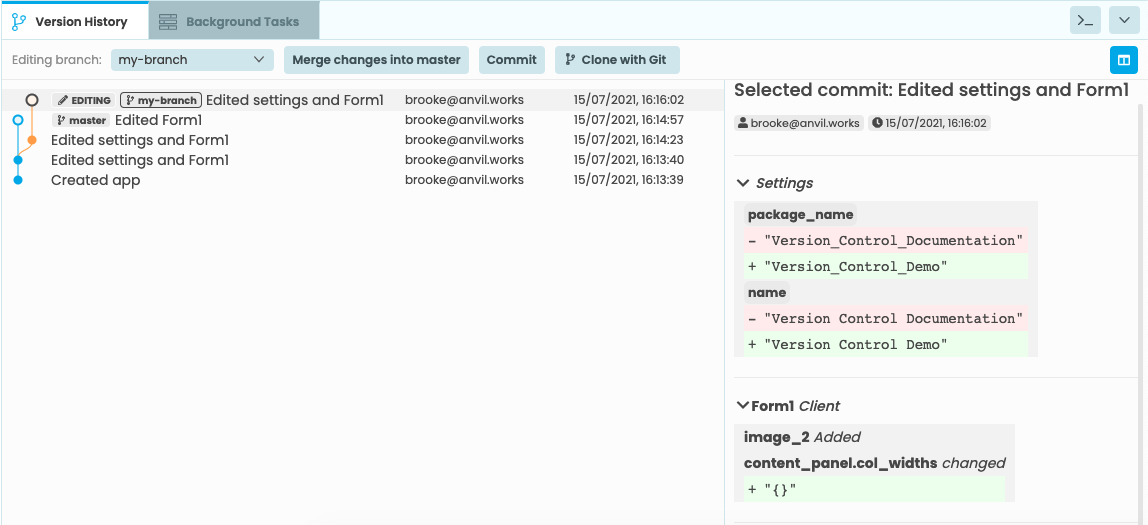
If you click on a commit, Anvil will compare that snapshot of your app with its parent, and show you what changed between the two. For example, here, we have added a component to Form1, and changed the name of our app:
Anvil creates a new commit each time you change your app. (If you change your app repeatedly in a short time, Anvil “squashes” all the changes into one commit – more on this later.)
Branches
You can also create branches in your app. These are labels that point to a particular commit. Your app starts with a single branch, called master. You can choose which branch you’re editing from the Editing branch dropdown. When you’re editing a branch, that means this branch will move as you edit your app, to point at each new commit as you create it.
Merging
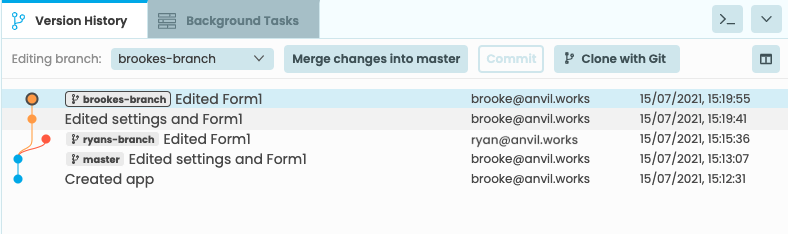
This is version control’s killer feature: It allows you to edit code at the same time as other developers without getting under each other’s feet. The way this works is for each developer to work on a different branch, creating diverging commit histories from the same parent:
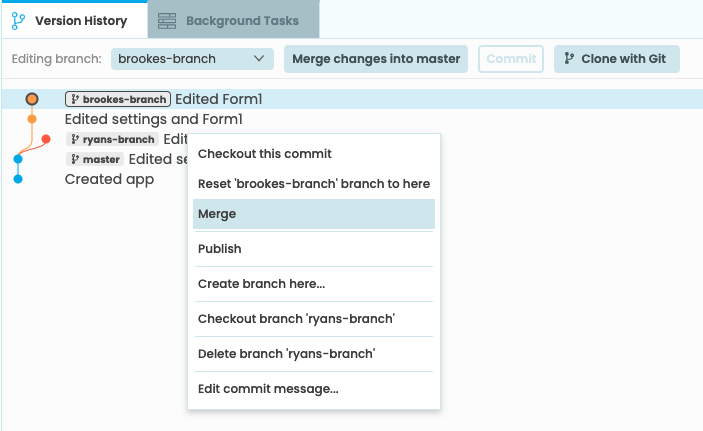
Then, you can merge those changes. Right-clicking on a branch will bring up a menu with more options. From this menu, you can merge branches into other branches.
Anvil will find the common parent, and use that to work out what has changed between that starting point and each of the commits you’re merging.
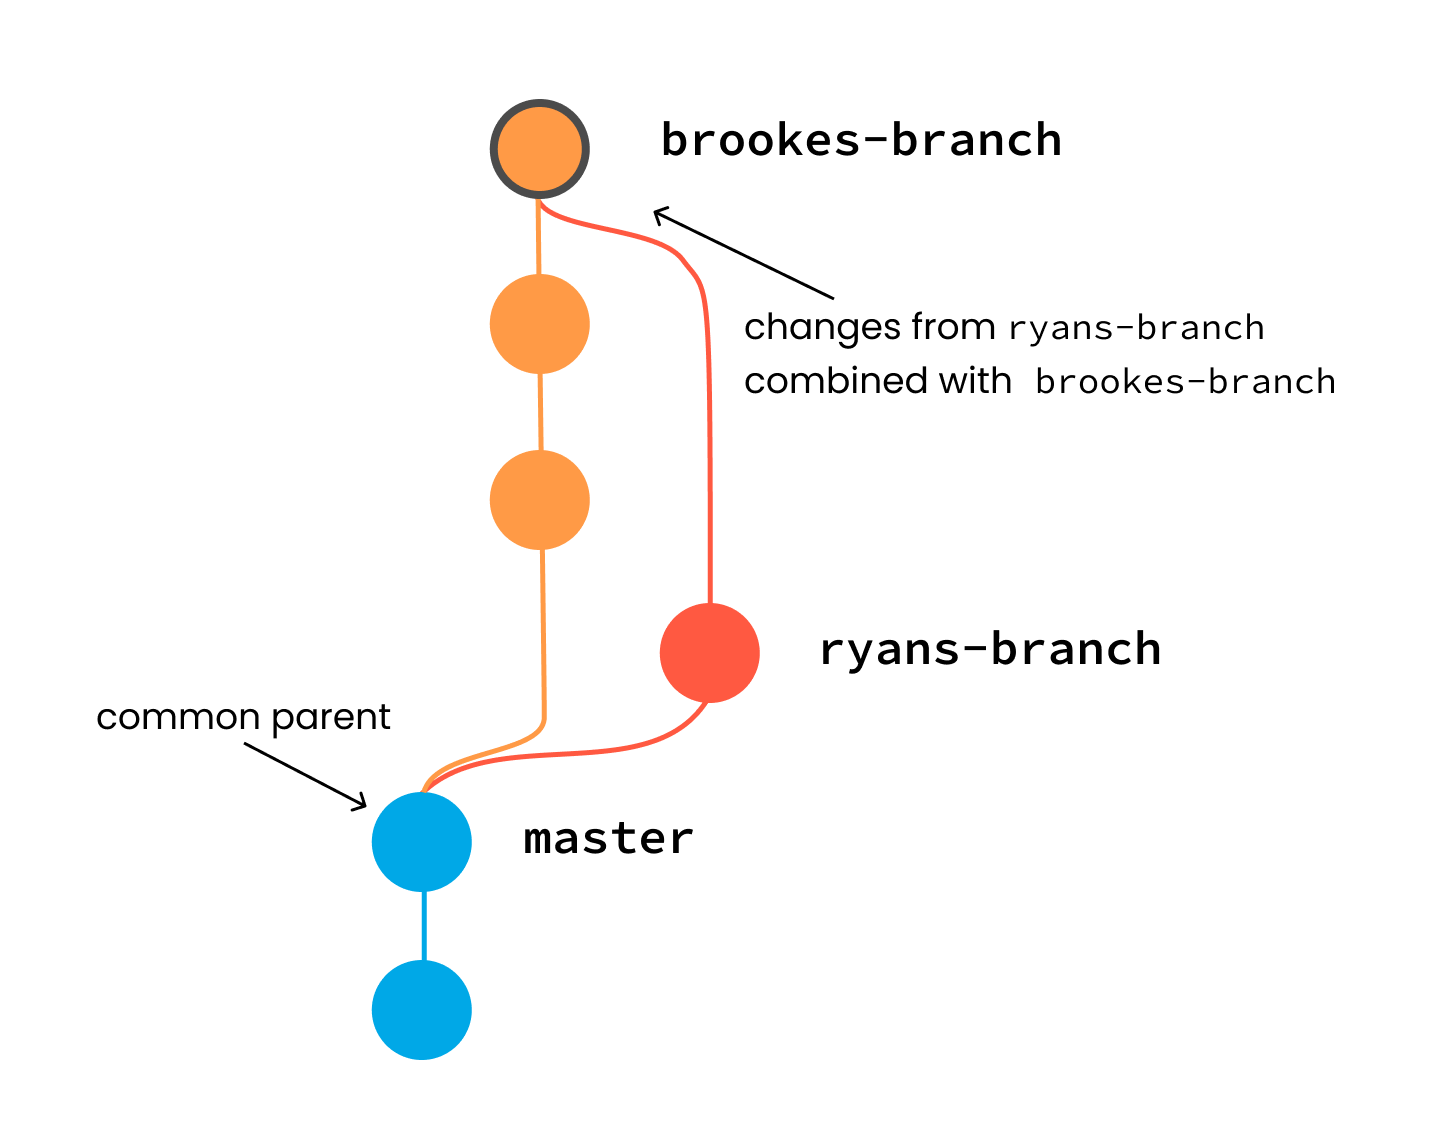
Then, it will combine both sets of changes:
Conflicts
Of course, sometimes Anvil can’t automatically combine both sets of changes. For example, if both sides have edited the same line of code, they will conflict, and you will need to sort them out by hand before completing the merge.
You can read more about resolving conflicts here.
Automatic commits
Every change you make to an Anvil app produces a commit. In order to avoid a huge string of commits, if you make changes in quick succession, Anvil will “squash” each new change into the latest commit – that is, it will create a new commit with your latest changes and the previous changes, and the same parent as the previous commit, then move the branch to point at the new commit. This effectively replaces the latest commit with the new one (In Git parlance, this is called “amending” a commit.)
If you have made a recent change subject to “squashing”, the Version History will display it with an outlined circle and an Editing label:
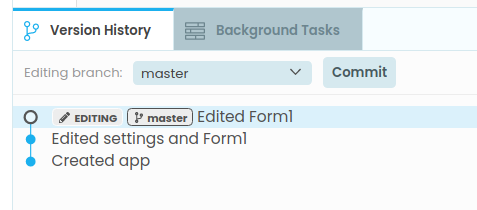
If you would like to “freeze” that commit, so that any new changes occur in a new commit, click the Commit button. You can enter a message to describe this commit, or keep the default message.
Anvil automatically freezes commits 15 minutes after the last edit, or if anything else refers to them (for example, if you merge this commit into another branch, or create a new branch pointing at this commit, or clone the repository with git).
Managing branches and commits
You manage branches and commits from the Version History panel.
Viewing changes
Click on any commit in the Version History to select it. Anvil will display the changes made in that commit.
Checking out branches and commits
Double-click any commit in the Version History to open that version of the app in the Anvil Editor. If there is a branch pointing at that commit, you will switch to editing that branch. You can also choose which branch to edit by choosing from the Editing branch dropdown.
If you double-click a commit that does not have a branch pointing at it, you will open that commit in read-only mode. You can see that snapshot in the editor, and you can run it, but you cannot make changes. If you want to make changes, you can create a new branch and add commits to that branch. (This is similar to “detached HEAD” mode in the Git command line tools.)
Creating and deleting branches
To create a branch, right-click on any commit in the Version History and select Create new branch.
To delete a branch, right click on the commit and choose Delete branch [branch name]. You can’t delete the branch you’re currently editing – switch to a different branch first! You can’t delete the master branch.
Resetting a branch
You can reset the branch you are editing, so it points to any commit. To do this, right click on the commit you want to move your branch to, and select Reset ‘[branch name]’ branch to here. This will not delete any commits – the commit you last pointed to will remain visible – it will just change which commit this branch points to.
Merging code
There are two ways to merge code.
1. The “Merge changes into master” button
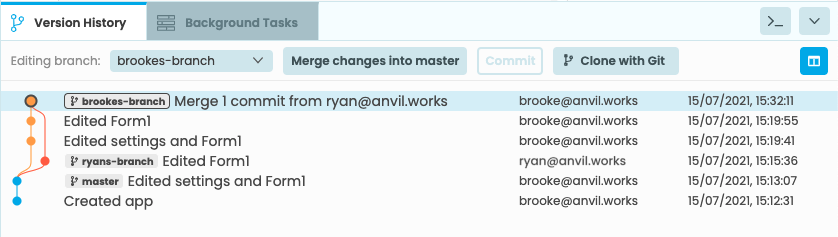
If you are editing a branch that is not master, you can click the Merge changes into master button. This merges changes from your branch into the master branch.
2. Merge a commit into your branch
If you want to merge changes into the branch you are currently editing, right click on the commit whose changes you would like to merge, and choose Merge. This will merge changes from that commit into the branch you are editing.
If Anvil finds conflicts while performing the merge, you will have to resolve them before continuing – see here for more information.
Publishing versions of your app
The Version History panel allows you to deploy your app on the web, with a publicly-accessible URL, and to choose which version your users see.
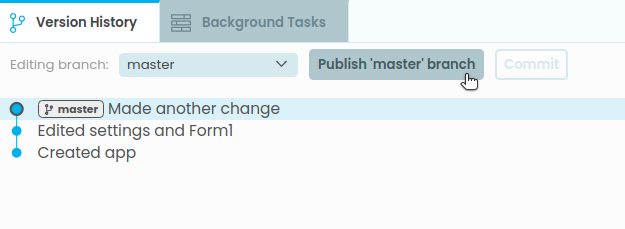
If you are editing a particular branch, you can click the Publish <branch name> button. This will ensure that whenever someone visits your app’s URL, they load the app from the current position of that branch (typically master):
To publish a specific commit, you can right-click on that commit and choose Publish this commit. This will ensure that whenever someone visits your app’s URL, they load the app from this commit:

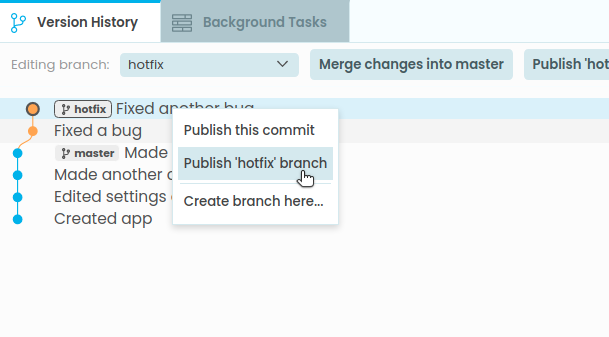
If you right-click on a commit pointed to by a branch, you can choose whether to publish the branch (so that the published version updates when the branch moves) or the commit (so that exact commit will be published, regardless of whether the branch moves):
Classic apps
If you are editing an app created in the Classic editor, and you have not migrated to environments, then the “Publish…” button will not appear. You can right-click on a particular version to publish or un-publish it.
This has the same effect as in the Classic editor: namely, it creates or deletes a branch called published. If the published branch is present, your users will load that version of your app. Otherwise, they will load the master branch of your app.
Advanced
Anvil supports advanced deployment configurations, with multiple deployment environments. In this case, it doesn’t make sense to talk about a single “published version” of your app.
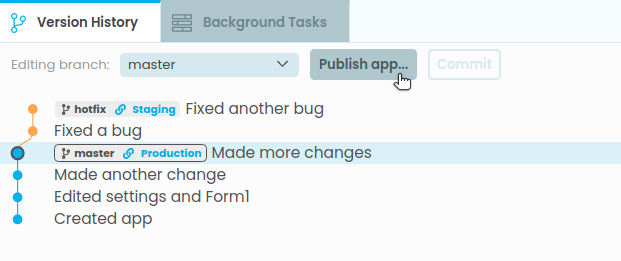
Therefore, if you have manually created deployment environments for your app, you won’t see the Publish this commit or Publish this branch option in the right-click menu. Instead, the Publish app… button will open the Environments dialog so that you can configure your deployment:
Do you still have questions?
Our Community Forum is full of helpful information and Anvil experts.