
Customising the Users service
Anvil’s support for user authentication is simple to set up – you only need one line of code to get started. But it’s also very flexible – you can use the Python APIs to take full control of the authentication system, or build something entirely custom.
In this guide, I’ll walk you through an example: a library we’ve built to help you customise the login and sign-up system in your apps.
This library features:
-
Custom login and sign-up forms
-
Additional sign-up validation (you must supply a name to sign up)
-
Custom sign-up confirmation and password reset emails
I’ll also show you how this library works, so that you can customise it further yourself.
This app is a great example of how you can take some client-side behaviour, server-side behaviour and UI and package it all up as a dependency that can be used with simple function calls from another app.
This is not a from-scratch guide to building your own custom user authentication system. Instead, in this guide, we’ll use an example custom user authentication system we’ve already built. We’ll show you how to use it, and then we’ll dig in and show you how it works.
You can, of course, build your own system from scratch, using the Python API in the anvil.users module. The Users Service documentation also provides additional detail.
Click the following link to copy the library into your account and explore it yourself:
1. Clone the app
The first step is to clone the library, so you can use it in your own apps:
Add the dependency to an existing app
Next, we’ll add the app you just cloned as a dependency to an existing app. Log in to Anvil and open the existing app that you’d like to customise.
Or, if you’re starting from scratch, create a new app: Log in to Anvil, click ‘New Blank App’, and choose the Material Design theme.
Open your app’s Settings, and choose Dependencies:

From the ‘Select a dependency’ dropdown, select the ‘Custom sign up flow’ app that you cloned above. It will then appear in the list of dependencies:

Add the Users Service
Next, we’ll add the Users Service. In the panel on the left, click the ‘+’ next to ‘Services’, then select the Users service.
You’ll see the standard screen which allows you to configure the built-in behaviour of the Users service.
For now, let’s choose the following:
Supported sign-in methods:
- Email + password
New user registration:
- Confirm email address before users can log in
- New user accounts can be used right away
Do not check “Allow visitors to sign up”. We’re using our own sign-up system, so we can leave the built-in one disabled.
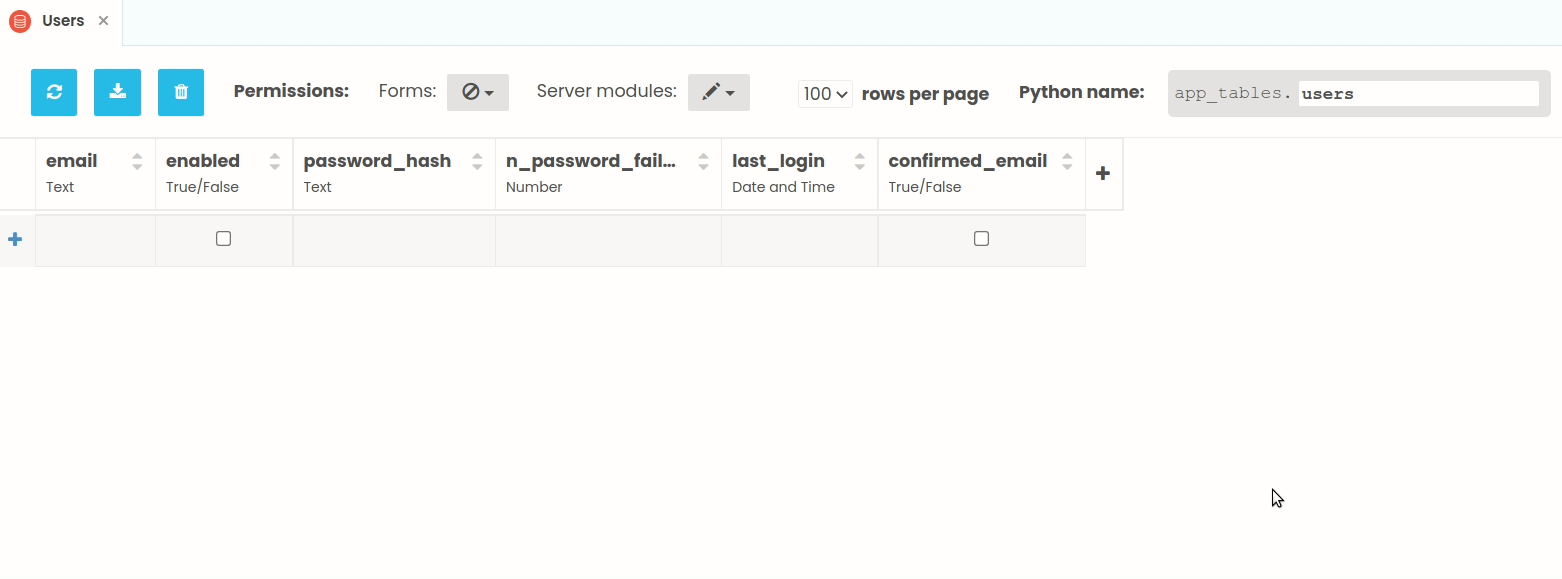
If you open your app’s data tables, you’ll see your app now has a ‘Users’ Table. This is where your app will store login information for each of your users.

Customise the ‘Users’ table
We’re going to add some columns the Users table, so that it stores all the information our library requires to implement its custom sign-up and login flow.
We’ll add the following columns to the users table:
name(Text column)link_key(Text column)
We will use the confirmed_email (True/False) and password_hash (text) columns that the Users Service has helpfully already created for us.
Start by adding a column for the password hash, by clicking ‘+ New Column’ and choosing ‘Add text column…’. Enter name as the name for the new column:
Keep adding columns until your Data Table has the structure described above.
Your table should look like this:

Add the Email service
We’re going to use Anvil’s Email service to send our confirmation and password reset emails.
In the panel on the left, click the ‘+’, then select the Email service. The Email service works straight out of the box, so no configuration is required.
Our app now has all the services required to use the custom sign-up and login flow.
2. Create the UI
Next, we’ll create the UI for users to trigger the login or signup operations. We construct the UI by dragging-and-dropping components from the Toolbox into the page.
Select ‘Form1’ from the App Browser, and drop a Button ![]() from the Toolbox into the page.
from the Toolbox into the page.
Below the Toolbox, you’ll see the Properties Panel, where you can edit the styling and behaviour of your components.
In the Properties Panel:
- Change the
namefrom ‘button_1’ to ’login_button’ - Change the
textfrom ‘button_1’ to ‘Log in’ - Change the
roleto ‘primary-color’.
Drop a Label ![]() into the page, and in the properties panel:
into the page, and in the properties panel:
- Change the
namefrom ’label_1’ to ’login_status’
Drop another Button ![]() into the page, and in the properties panel:
into the page, and in the properties panel:
- Change the
namefrom ‘button_1’ to ‘signup_button’ - Change the
textfrom ‘button_1’ to ‘Sign up’ - Change the
roleto ‘primary-color’.
That’s all the UI we need. Now, let’s connect our UI components to the custom signup flow dependency.
3. Call functions in the dependency
Double click on your ‘Log in’ button - this will take you to the Form Editor’s ‘Code’ view.
The first thing we want to do is to import the ’login_flow’ module from our dependency. Add this line to the top of your code, underneath the other import statements:
import custom_signup.login_flowWe want to call the login_with_form() method from our dependency when a user clicks the ‘Log in’ button on our app.
We created a login_button_click method when we double clicked our Log in Button. This is the Python method that runs when the ‘Log in’ Button is clicked. Edit the method to call the login_with_form() function from our dependency:
def login_button_click(self, **event_args):
  custom_signup.login_flow.login_with_form()
We’re also going to update our ‘status_label’ when a user logs in. To do that, we’ll first create a method called update_login_status. Add this method below your login_button_click method:
def update_login_status(self):
  # Get the currently logged in user (if any)
  user = anvil.users.get_user()
  if user is None:
    self.login_status.text = "You are not logged in"
  else:
    self.login_status.text = f"You are logged in as {user['email']}"
Let’s call this from our login_button_click method to show a user when they’re successfully logged in:
def login_button_click(self, **event_args):
  custom_signup.login_flow.login_with_form()
  self.update_login_status() # add this line
Next, let’s add signup functionality to our ‘Sign up’ button. Go back to the Form Editor’s ‘Design’ view:

Double click the ‘Sign up’ Button, and edit the signup_button_click method to call the signup_with_form() method in our dependency, and then update_login_status to show if the user has been successfully logged in:
def signup_button_click(self, **event_args):
  custom_signup.login_flow.signup_with_form()
  self.update_login_status()
4. Handle email confirmation links
The signup_with_form() method in our dependency will send new users an email with a confirmation link.
This will cause them to arrive on our app with a location_hash in the url (see the how it works section for more info).
To handle this, we want to call a method in the dependency when our app loads. This method determines what content to display to the user based on the information in the url_hash.
We’ll do this using a startup module which will run when the app loads.
Let’s create a module. Open the menu next to “Client Code” in the App Browser, and select ‘Add Module’:

We want this module to run when our app loads, so we’ll set this to be the startup module. Open the dropdown menu next to ‘Module1’ in the App Browser, and select ‘Set as startup module’.

Remove the say_hello method, and update the code in ‘Module1’ so that it calls a function from our dependency before opening the first form. The code looks like this:
from anvil import open_form
import custom_signup.login_flow

custom_signup.login_flow.do_email_confirm_or_reset()
# Open Form1
open_form('Form1')
That code first imports the login_flow module from the dependency, and open_form from the anvil module.
When the app starts, it calls do_email_confirm_or_reset() to check whether the app is loading because the user clicked a confirmation link in their inbox, and update the Users table if so. It then opens Form1 (which is what would happen by default if Form1 were the startup form).
The do_email_confirm_or_reset() method in the dependency looks at the url hash to determine whether it needs to process an email confirmation or password reset.
This might also log the user in, so we’ll call update_login_status() when ‘Form1’ is opened. Go back to Form1’s ‘Code’ view and update the __init__ method of ‘Form1’ to look like this:
def __init__(self, **properties):
    # Set Form properties and Data Bindings.
    self.init_components(**properties)

    # Any code you write here will run before the form opens.
    self.update_login_status() # add this line
App customised!
That’s all you need to use the custom sign-up flow library in your app. Run your app, sign up for an account and you’ll notice this custom functionality:
- You need to supply a name to sign up
- You need to supply matching passwords to sign up
- After you sign up, you’ll receive an email with a confirmation link to sign up
- Clicking the confirmation email link will take you to your app, and you’ll be automatically logged in
Have a play around to see what other functionality the dependency provides…
Next, I’ll walk you through some of the functionality of the login_flow module of the Custom sign up flow app that we’ve added as our dependency.
5. How it works
Let’s take a look at the functionality of the ’login_flow’ module and server-side code in the Custom sign-up and login flow app.
Open the “Custom Signup Flow” app you cloned earlier, and look at the ’login_flow’ module. If you didn’t clone the library, click the link below to clone it now:
Sign-up
We’ll start by looking at the signup_with_form() method that we call when a new user signs up:
def signup_with_form():
  d = SignupDialog()

  while True:
    if not alert(d, title="Sign Up", buttons=[("Sign Up", True, 'primary'), ("Cancel", False)]):
      return

    if d.password_box.text != d.password_repeat_box.text:
      d.signup_err_lbl.text = 'Passwords do not match. Try again.'
      d.signup_err_lbl.visible = True
      continue

    err = anvil.server.call('_do_signup', d.email_box.text, d.name_box.text, d.password_box.text)
    if err is not None:
      d.signup_err_lbl.text = err
      d.signup_err_lbl.visible = True
    else:
      alert(f"We have sent a confirmation email to {d.email_box.text}.\n\nCheck your email, and click on the link.")
      return
First, we create an instance of the ‘SignupDialog’ Form which you can customise the look and feel of fully yourself.
In a loop, we use an anvil alert to display the ‘SignupDialog’ Form with ‘Sign up’ and ‘Cancel’ buttons. If the user clicks ‘Sign up’, we check that the passwords match. If they do, we call a _do_signup server function and pass the email address, name, and password. If the server function returns an error, we display that error. Otherwise, we display an alert that says we’ve sent a confirmation email.
Next, let’s look at what the _do_signup server function does. (Ctrl+click the function name in the login_flow module to navigate to the server function)
@anvil.server.callable
def _do_signup(email, name, password):
  if name is None or name.strip() == "":
    return "Must supply a name"

  pwhash = hash_password(password, bcrypt.gensalt())

  # Add the user in a transaction, to make sure there is only ever one user in this database
  # with this email address. The transaction might retry or abort, so wait until after it's
  # done before sending the email.

  @tables.in_transaction
  def add_user_if_missing():
    user = app_tables.users.get(email=email)
    if user is None:
      user = app_tables.users.add_row(email=email, enabled=True, name=name, password_hash=pwhash)
      return user

  user = add_user_if_missing()

  if user is None:
    return "This email address has already been registered for our service. Try logging in."

  _send_email_confirm_link(email)

  # No error = success
  return None
The function has an underscore in its name. This means when this app is used as a dependency, that server function won’t appear in the autocompleter for anvil.server.call.
The _do_signup function:
- Enforces the requirement that you must specify a name.
- Hashes the password using the bcrypt algorithm
- In a transaction, adds the user to the table if they don’t already exist, returns the appropriate error if they do
- Calls
_send_email_confirm_linkto send an email confirmation link.
Let’s take a look at the _send_email_confirm_link function:
@anvil.server.callable
def _send_email_confirm_link(email):
  """Send an email confirmation link if the specified user's email is not yet confirmed"""
  user = app_tables.users.get(email=email)
  if user is not None and not user['confirmed_email']:
    if user['link_key'] is None:
      user['link_key'] = mk_token()
    anvil.email.send(to=user['email'], subject="Confirm your email address", text=f"""
Hi,

Thanks for signing up for our service. To complete your sign-up, click here to confirm your email address:

{anvil.server.get_app_origin('published')}#?email={url_encode(user['email'])}&confirm={url_encode(user['link_key'])}

Thanks!
""")
    return True
This function:
- Checks that the user has not already confirmed their email address
- Calls
mk_token()to create a random 14-character token to act as this user’s ’link_key’ - we verify this key when they navigate back to the app using the email confirmation link. This makes sure that they own the email address provided. - Sends the email confirmation link using Anvil’s Email Service. We use ‘
#?’ to put the email address and confirmation key into the url hash.
Email confirmation
When the user clicks the email confirmation link, it will open our app and startup module will call do_email_confirm_or_reset (we added this to ‘Module1’ earlier in this tutorial).
Let’s look at the do_email_confirm_or_reset function. Navigate back to the ’login_flow’ module to look at the code:
def do_email_confirm_or_reset():
  """Check whether the user has arrived from an email-confirmation link or a password reset, and pop up any necessary dialogs.
     Call this function from the 'show' event on your startup form.
  """
  h = anvil.get_url_hash()
  if isinstance(h, dict) and 'email' in h:
    if 'pwreset' in h:
      if not anvil.server.call('_is_password_key_correct', h['email'], h['pwreset']):
        alert("This is not a valid password reset link")
        return

      while True:
        pwr = PasswordResetDialog()
        if not alert(pwr, title="Reset Your Password", buttons=[("Reset password", True, 'primary'), ("Cancel", False)]):
          return
        if pwr.pw_box.text != pwr.pw_repeat_box.text:
          alert("Passwords did not match. Try again.")
        else:
          break

      if anvil.server.call('_perform_password_reset', h['email'], h['pwreset'], pwr.pw_box.text):
        alert("Your password has been reset. You are now logged in.")
      else:
        alert("This is not a valid password reset link")

    elif 'confirm' in h:
      if anvil.server.call('_confirm_email_address', h['email'], h['confirm']):
        alert("Thanks for confirming your email address. You are now logged in.")
      else:
        alert("This confirmation link is not valid. Perhaps you have already confirmed your address?\n\nTry logging in normally.")
This function:
- Extracts the url_hash, and checks that an email address is present.
- If the url hash contains an email address and ‘confirm’, this means they clicked on the confirmation link that we emailed them. So, we call the
_confirm_email_addressserver function to confirm the email address, passing the email and the link_key.
Let’s take a look at the _confirm_email_address server function (Ctrl+click to navigate to it from the login_flow module):
@anvil.server.callable
def _confirm_email_address(email, confirm_key):
  """Confirm a user's email address if the key matches; return True if it did."""
  user = get_user_if_key_correct(email, confirm_key)
  if user is not None:
    user['confirmed_email'] = True
    user['link_key'] = None
    anvil.users.force_login(user)
    return True
def get_user_if_key_correct(email, link_key):
user = app_tables.users.get(email=email)
if user is not None and user['link_key'] is not None:
# Use bcrypt to hash the link key and compare the hashed version.
# The naive way (link_key == user['link_key']) would expose a timing vulnerability.
salt = bcrypt.gensalt()
if hash_password(link_key, salt) == hash_password(user['link_key'], salt):
return userThe _confirm_email_address function:
- Calls
get_user_if_key_correctto check that the link_key is correct. This fetches the user from database, checks there is a ’link_key’ in the Data Table row to compare against. If a link_key is present, we use the bcrypt hashing algorithm to compare the link key that they supplied to the one in the database. This defends against timing attacks from a naive string comparison. - If the key is correct, we set the ‘confirmed_email’ column of the Data Table to True, clear the link_key, and use
anvil.users.force_loginto log the user in instantly.
I’ll leave you to explore the password reset functionality.
Login
Finally, let’s look at how the login system works. We call the login_with_form method in the login_flow module to log our users in. Navigate back to the ’login_flow’ module, and to the login_with_form method. This is similar to the signup_with_form method:
def login_with_form(allow_cancel=False):
  """Log in by popping up the custom LoginDialog"""
  d = LoginDialog()

  BUTTONS = [("Log in", "login", "primary")]
  if allow_cancel:
    BUTTONS += [("Cancel", None)]

  while anvil.users.get_user() is None:
    choice = alert(d, title="Log In", dismissible=allow_cancel, buttons=BUTTONS)

    if choice == 'login':
      try:
        anvil.users.login_with_email(d.email_box.text, d.password_box.text, remember=True)
      except anvil.users.EmailNotConfirmed:
        d.confirm_lnk.visible = True
      except anvil.users.AuthenticationFailed as e:
        d.login_err_lbl.text = str(e.args[0])
        d.login_err_lbl.visible = True

    elif choice == 'reset_password':
      fp = ForgottenPasswordDialog(d.email_box.text)

      if alert(fp, title='Forgot Password', buttons=[("Reset password", True, "primary"), ("Cancel", False)]):

        if anvil.server.call('_send_password_reset', fp.email_box.text):
          alert(f"A password reset email has been sent to {fp.email_box.text}.")
        else:
          alert("That username does not exist in our records.")

    elif choice == 'confirm_email':
      if anvil.server.call('_send_email_confirm_link', d.email_box.text):
        alert(f"A new confirmation email has been sent to {d.email_box.text}.")
      else:
        alert(f"'{d.email_box.text}' is not an unconfirmed user account.")
      d.confirm_lnk.visible = False

    elif choice is None and allow_cancel:
      break
This function:
- Takes an ‘allow_cancel’ parameter to decide whether or not to show a ‘cancel’ button.
- Creates a instance of the ‘LoginDialog’ Form, and adds the appropriate buttons.
- Checks if a user is already logged in - if they are, it skips the whole process. Otherwise, it displays the instance of the ‘LoginDialog’ Form in an alert.
- If the user clicks the ‘Log in’ button, it uses the standard
anvil.users.login_with_email()method to log them in. In this case, the standard behaviour of the Python API does all we need. We can mix and match the standard API functionality with something completely custom. This is because user records are just rows in a database and we can handle them both ways. - If the email address hasn’t been confirmed, we show them a link to re-send the confirmation email.
- If the authentication has failed, we show the exception text on the ’login_err_label’ on the ‘LoginDialog’ Form.
Users can also choose to reset their password which shows a different alert and calls a different server function, or to resend their email confirmation link.
I’ll leave you to explore the rest for yourself!
That’s it!
And that’s it. You’ve just learned how to implement a fully customisable login and sign-up flow.
You can use the following link to clone the Custom signup flow app in the Anvil editor, and:
- explore it for yourself
- add it as a dependency and start using the custom authentication flow right away
- use it as a starting point to build your own custom signup flow
Do you still have questions?
Our Community Forum is full of helpful information and Anvil experts.